Collar Types
1/2" Wide Collars
3/4" Wide Collars
1" Wide Collars
1 1/4" Wide Collars
1 1/2"Wide Collars
2" Wide Collars  
Beaded Collars
Lurcher Sets
Collar/Leash Sets
Leashes
Necklaces
Charms & Tassles
ID Tags
Customer Photo Gallery
How to take care of your new collars
Gift Certificates
Frequently Asked Questions
How to Measure for Collar Size
Shipping Info
Links
About Us
IG Rescue


Collar Styles


Home | Contact Us |

DirtBag.com? Noooooo
  Back to Fun Stuff List
Giving the Pond a Facelift

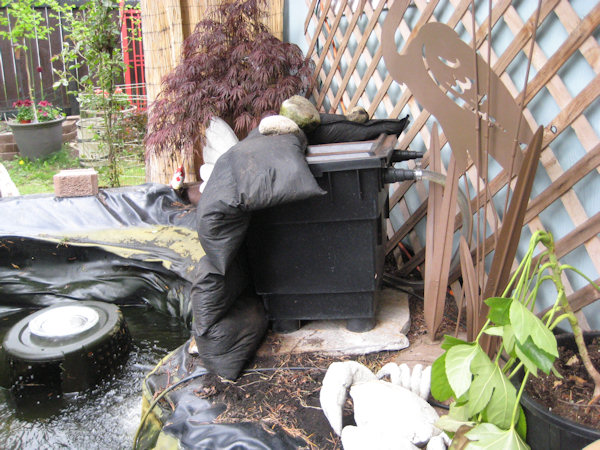
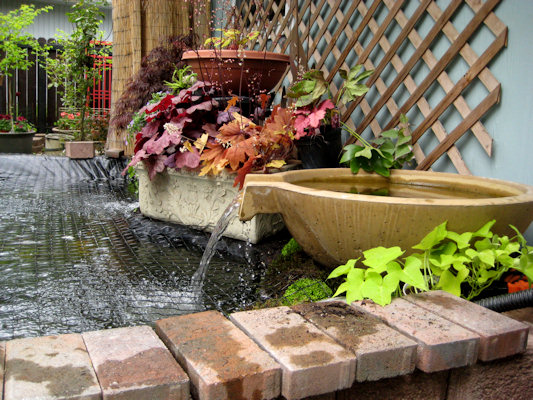
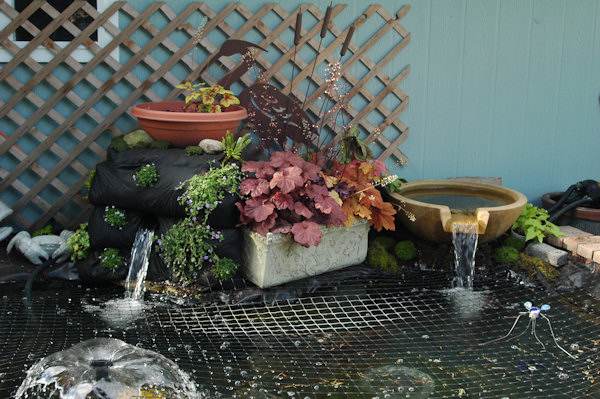
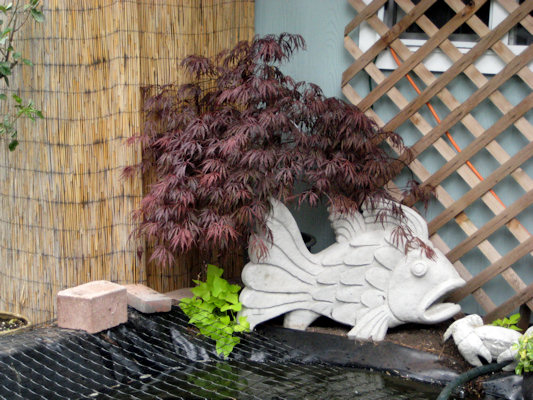
Problem: Ugly Filter Box

The pond took a beating this winter and it's time for its Spring Overhaul. We have a new basin, netting to protect against raccoons, plans for a new patio cover and something has to be done about that UGLY filter box. The fish woke up early this year, so they've already been moved outside.

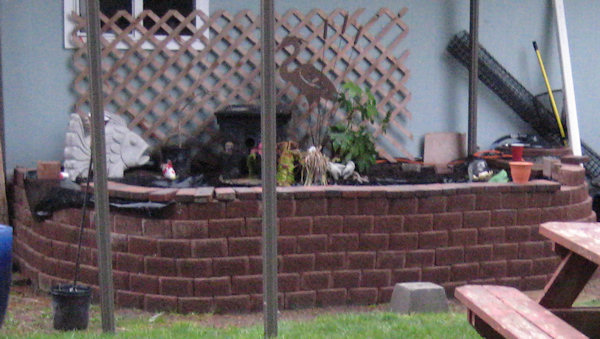
First we cleared the area and pulled down the temporary cover we had over the pond. The cover cuts down on the algea and bird visits but was not meant to be perminant. The basin has been prepped and planting has been planned...but nothing comes to mind for that awful looking black filter box.

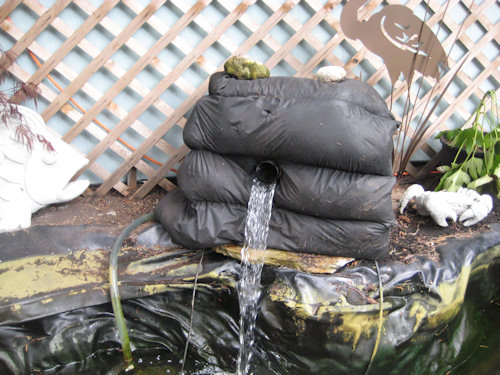
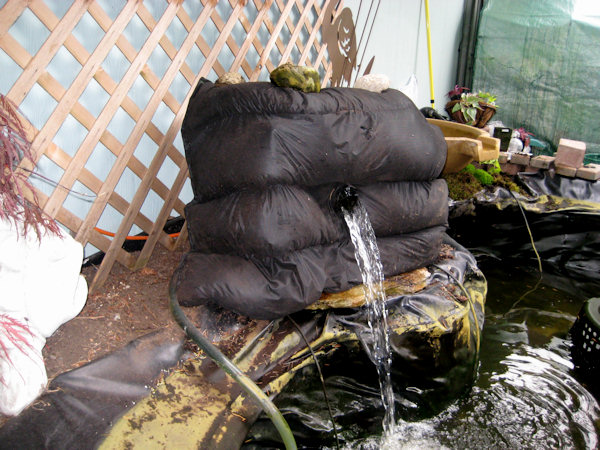
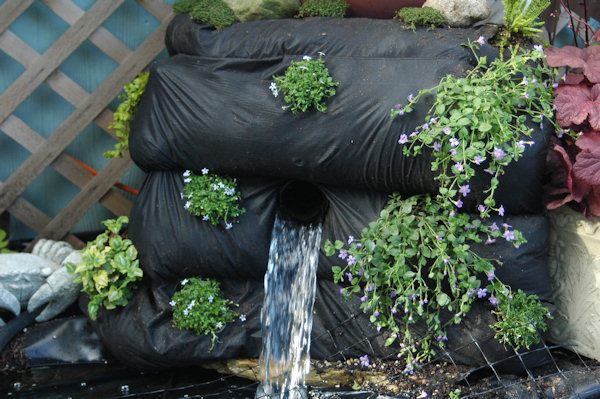
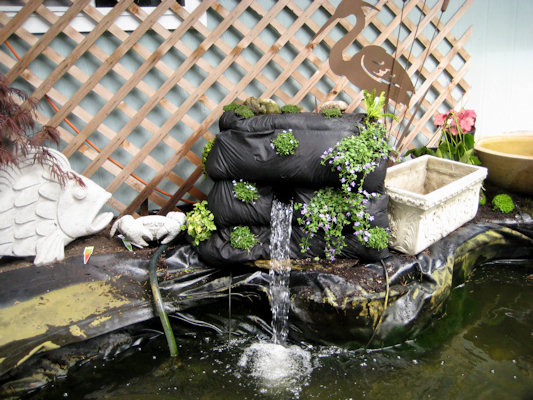
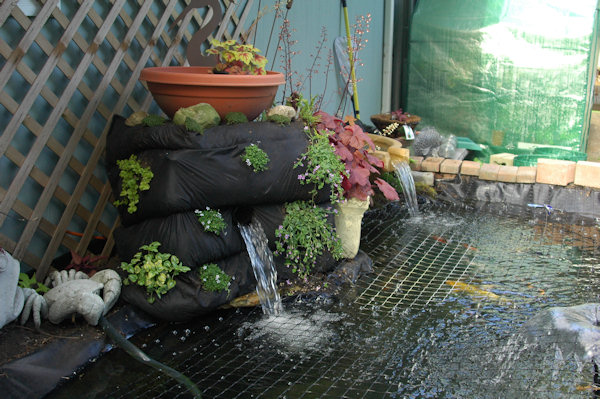
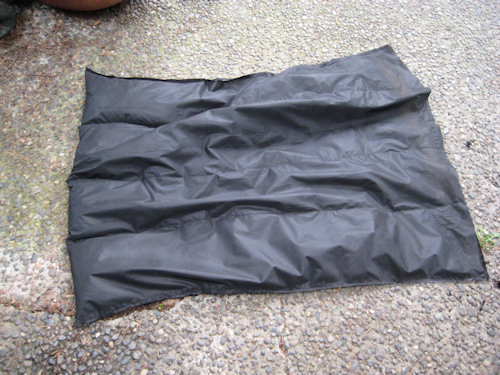
Filter Box Solution: The Dirt Bag Experiment - Landscape cloth, sewing machine, staples, dirt.

Optional Step One: Drain 50% - 75% of the water out of the pond so you don't drown or freeze.

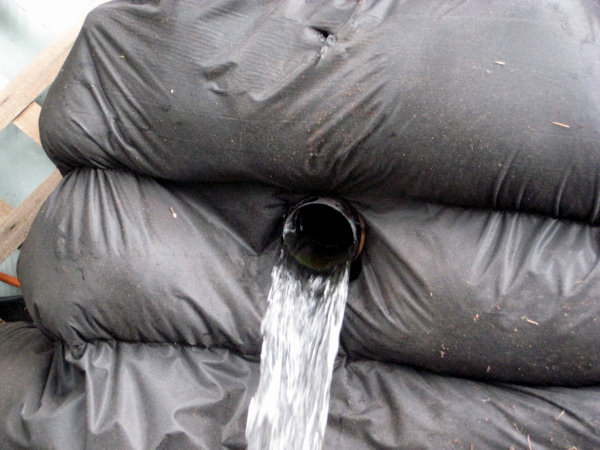
Firt I wrestled the innocent looking DRY Dirt Bag onto the filter and used rocks to make it stay in place. Then I cut a hole for the water return tube, clamped it with a hanful of super rubberbands and turned the water on.

Backing away from the box, it still doesn't look half bad. The bag seems stable and settles into place, with the help of the rocks on top. I'm calling 'The Dirt Bag Wrestling Match' phase complete when everything is set and the Filter Box functions normally.

I wrapped the bag around to cover the front and one side of the box completely. Hopefully it will look like a green hill over time.

Woops, there's that ugly filter showing - I'll hide that side next. (Yes, that's a laundry basked in the pond. The fish needed a couple places to hide and this works great.) First I water down the bag to get it ready for planting - it weighs a ton and is not going anywhere.

Next are the Plants - this part is harder than it looks. You don't want the holes huge, but you want to get the plants and roots in there without too much trauma. Start with small plugs or you'll apologize to alot of plants during this process.

Not a bad start, but it looks like I'm going to need a few more plants. I only got a handful when I started this, just in case it didn't go well.

Time to add the filter camoflage on the side, starting with a fancy planter.

Adding another basin shaped planter on top to cover the lid. It echos the basin fountain and gives an elevation change to the design, but I'll plant it when it warms up a bit more. Next I add some plants to the side planter to help hide the filter.

I then top off the pond so the koi can have their home back. I definitely need a few more plants for the Dirt Bag, now that I know it will work. I'll add those tomorrow and hopefully they will grow in quickly.

The new concrete basin was set last week and finished off today with plants and moss was added around the bottom.

Adding a little color with Heucheras and Sweet Potato Vines. Netting protects the fish from the evil raccoons. The sweet potato vine should grow up the trellis behind the pond - hopefully.

All 3 filter fountains are back online and the glass Mosquito is set on the protective netting. The patio cover still needs to be built for shade and protection.

Adding a Japanese Maple behind the concrete fish for a bit more color and texture.

Finished planting project for now. I'll get more photos when the sun comes out.

COPYRIGHT © PILUZO 2006 , ALL RIGHTS RESERVED